• Skip to secondary menu
  • Skip to main content
  • Skip to primary sidebar
  • Clearance Rack
  • Product Suites
  • Bundled Savings
  • Kits & Subscriptions

Tina Zinck, Stampin' Up! Demonstrator

Teaching others the art of stamping and paper crafting. Let me show you how to use the exceptional products from Stampin' Up! and all the different ways you can create with them!

  • Home
  • Events
  • Gallery
  • Videos
  • Catalogue(s)
  • Specials
    • Free Projects Every Month!
  • Shop Now!
  • Join the fun
    • Sign Up Online!
  • About Me
    • Contact

Painted with Love Petal Palette Card Tutorial

January 8, 2018 1 Comment


Hi Friends! I hope you had a great weekend! We had our monthly Serene Stampers “Stamp n’ Share” and “Mystery Stamping Hour” this past Saturday and it was so much fun! This is when members in my Serene Stampers group from all across Canada and I meet up in our Facebook group to share ideas,chat about new products, shout outs for their achievements and have a prize patrol. Then we stamp together! How this works is I’ll provide step by step instructions for a card layout and they we all take photos of our finished cards and post them. It’s amazing how different and beautiful each card turns out and we also get lots of inspiration this way too.

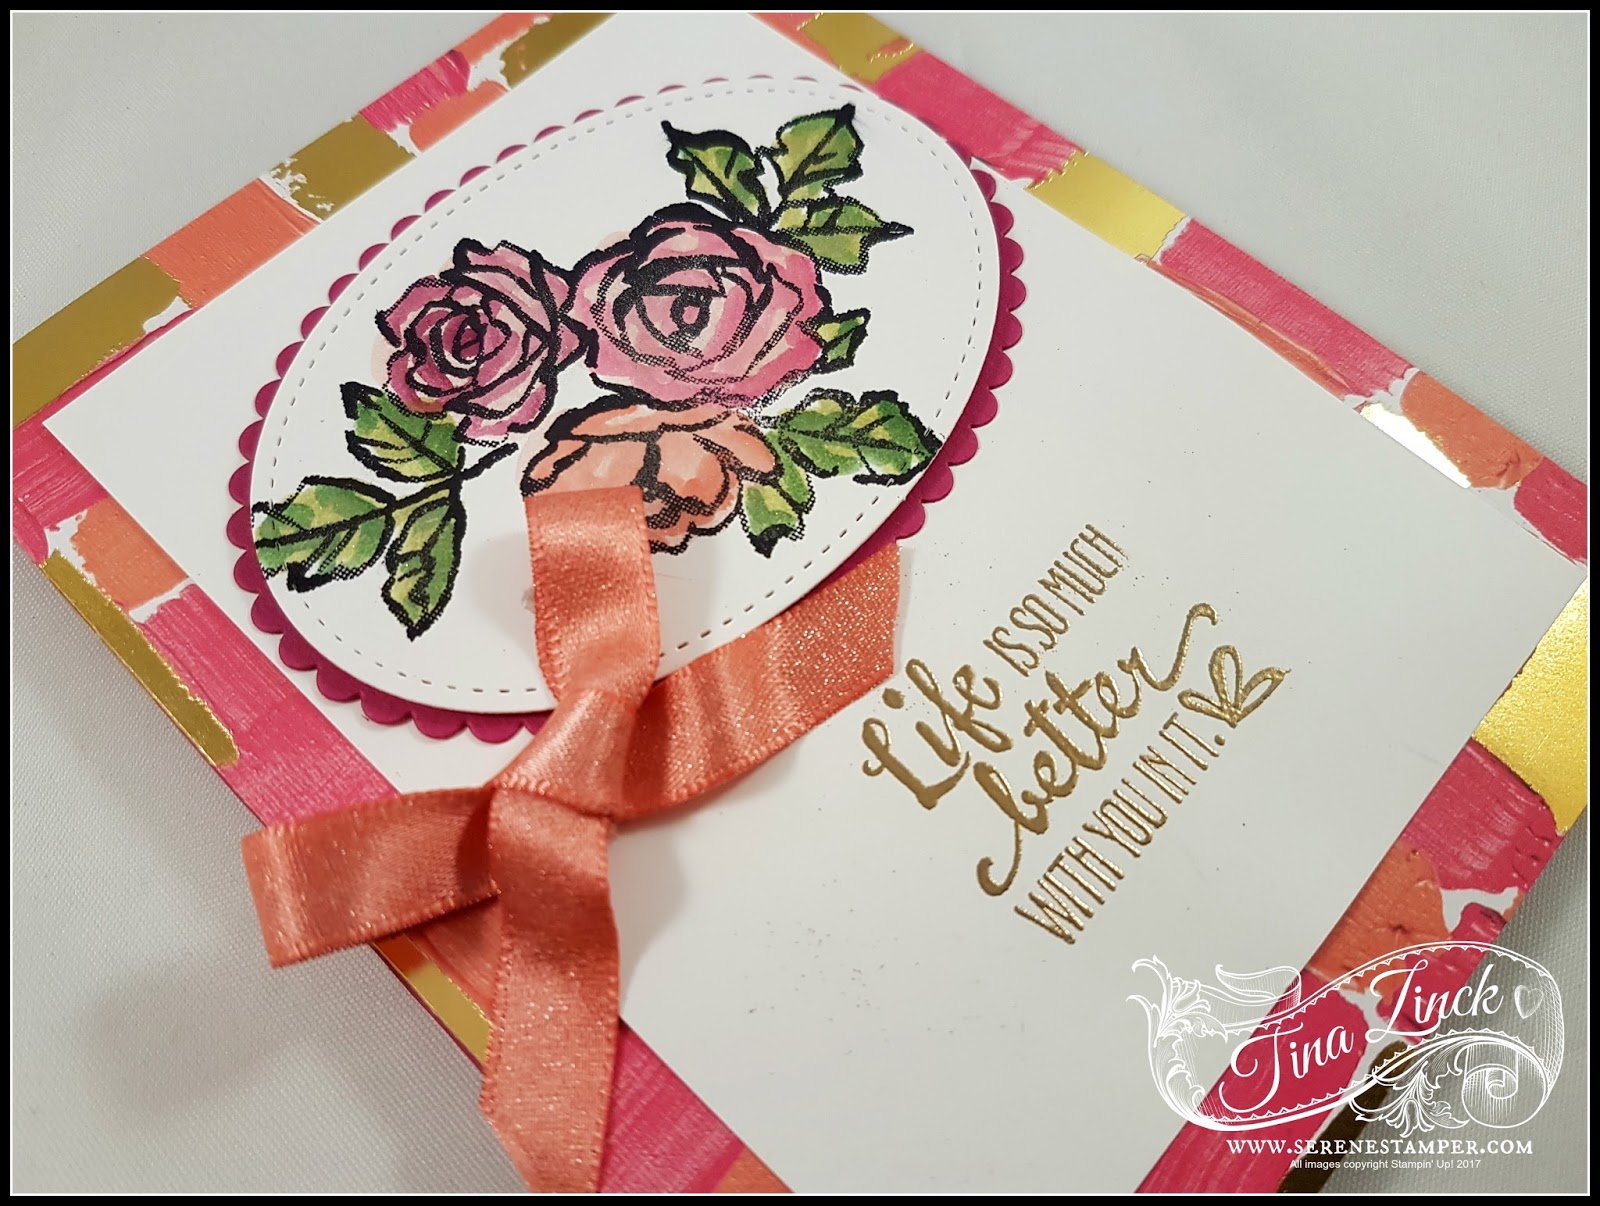
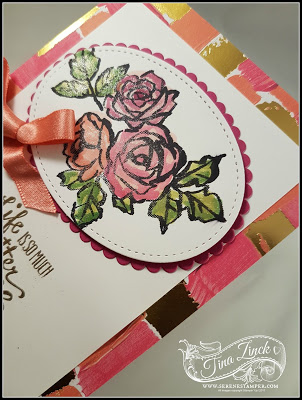
Today’s card tutorial is for my finished card from our “Mystery Stamping Hour”. I used the “Petal Palette” stamp set and the gorgeous “Painted with Love” Specialty Designer Series Paper:

I hadn’t planned on putting a bow on my card but somehow I got some adhesive on the front of the card and ripped it (gasp). So I grabbed a piece of the beautiful new Calypso Coral Shimmery Ribbon (FREE Ribbon Pack from SAB) and covered up the ripped bit and you’d never know it was there! 
I also added some Clear Wink of Stella to the stamped flowers and leaves to make them all sparkly. I love stamping with my “Serene Stampers” and I was happy with how this card turned out.  When you purchase the Stampin’ Up! starter kit you automatically become a member of my Serene Stampers community and I’d love for you to join us! To learn more click here.

I hope you enjoy today’s tutorial!

Supplies:
  • Stamp
    Set

    –
    Petal
    Palette
    (145788
    C or 145788 W)
  • Cardstock
    –
    Whisper White (100730); Berry Burst (144243)
  • Stamp
    Pads

    – Versamark (102283); Basic Black Archival (140931); Berry Burst
    (144083); Calypso Coral (126983); Rich Razzleberry (126950); Old
    Olive (126953); Garden Green (126973)
  • Misc.
    Painted with Love Specialty Designer Series Paper (145580); Big Shot
    (143263); Stampin’ Dimensionals (104430); Multipurpose Liquid Glue
    (110755); Embossing Buddy (103083); Gold Stampin’ Emboss Powder
    (109129); Heat Tool (103083); Aqua Painters (103954); Stampin’
    Trimmer (126889); Big Shot (143263); Magnetic Platform (130658);
    Layering Ovals Framelits (141706); Stitched Shapes Framelits
    (145372); Shimmer Ribbon Pack (SAB 147243); Mini Glue Dots (103683);
    Clear Wink of Stella (141897)
Measurements:

  • Berry
    Burst: 5-1/2″ x 8-1/2″, 4” x 3”
  • Whisper
    White: 3-3/4″ x 4-3/4″, 3 1/2” x 2 3/4”
  • Painted
    with Love Specialty DSP – 5 1/2” x 4 1/4”

Instructions:
  1. Fold
    Berry Burst card stock in half to create base.
  2. Adhere
    the Painted with Love DSP onto front of card base with Multipurpose
    Liquid Glue (or adhesive of choice).
  3. Run
    4” x 3” piece of Berry Burst card stock through the Big Shot
    using scalloped oval die.
  4. Run
    3 1/2” x 2 3/4” piece of Whisper White card stock through the
    Big Shot using Stitched Shape Oval die to fit inside Berry Burst
    oval.
  5. Use
    Black Archival ink to stamp flower image from Petal Passion set onto
    Whisper White Stiched Shape oval die cut. Color with aqua painter
    and ink pads. Add a touch of Clear Wink of Stella to the flowers and
    leaves. Use Stampin’ Dimensionals to adhere to Berry Burst oval die
    cut. Set aside.
  6. Rub
    embossing buddy on lower portion of 3 3/4” x 4 3/4” piece of
    Whisper White card stock. Stamp sentiment from Petal Passion using
    Versamark ink pad. Sprinkle Gold Stampin’ Emboss Powder over top,
    shaking off excess and set with Heat Tool. Glue Whisper White layer
    onto front of card.
  7. Glue
    Oval embellishment to top portion of Whisper White layer.
  8. Make
    a bow from Calypso Coral 3/8” Shimmery Ribbon and position on card
    with Mini Glue Dots.


“Customer Appreciation Tutorials” 
  • Every customer who places an order through my online store will receive 12 beautiful project sheets by email. 
  • When your order is a min. $60CDN
    you’ll also receive an exclusive BONUS “Passport Pals” tutorial! That’s
    right – Passport Pals is BACK!

Frenchie (France Martin) and I have teamed up once again to bring you an
additional six project tutorial!
Every project sheet includes
measurements, step-by-step instructions and supplies list. It’s been a
few years since Frenchie and I offered our Passport Pals tutorials and
we’re both super happy to bring these back to you every month!


Simply enter this month’s special host code prior to submitting
your order through my website. If your order is $200 or more DO NOT
enter the Host Code so that you will also receive your stamping rewards (I will still send you the PDF tutorials).

If you live in Canada, 
click the image below to shop with me and use this month’s host code:
7QS97UU4
 

http://www.stampinup.com/ECWeb/default.aspx?dbwsdemoid=1000037

If you live in the USA, 
click here to visit Frenchie on her to blog and 
here to shop through her online store.


Enjoy the day and HAPPY STAMPING!

Pin
Share
Tweet
Share
0 Shares

Filed Under: Miscellaneous Tagged With: 2018 Occasions, 2018 Sale-a-bration, Painted with Love Designer Series Paper, Petal Passion, SAB 2018

AvatarI joined Stampin' Up! the first night they arrived in Canada, April 2002, and what a ride it's been! At the time I just wanted the discount on all of the fabulous stamps and accessories - why pay full price if you don't have to, right? But little did I know where my journey with Stampin' Up! would take me. Read More…

Reader Interactions

Comments

  1. AvatarBeth Norman says

    January 10, 2018 at 1:36 pm

    HOw nice and fun to have a group on FB. Your card is gorgeous. I'm thinking I need that designer paper–it rocks.

    Reply

Leave a Reply Cancel reply

Your email address will not be published. Required fields are marked *

Primary Sidebar

Shop

January Host Code: PABBRQCN

Tina Zinck

Tina Zinck

Gold Elite ~ Stampin' Up!© Independent Demonstrator

Contact Me!

  • Email
  • Facebook
  • Instagram
  • Pinterest
  • YouTube
Subscribe to my newsletter

Stampin’ Up! Annual Catalog

Stampin' Up! 2020-21 Catalog

Spring Mini Catalogue(s)

Stampin' Up! Spring 2021 Catalogue

French Catalogue

Stampin' Up! Spring 2021 Catalogue

Sale-A-Bration Catalogue(s)

Stampin' Up! Sale-A-Bration 2021

French Catalogue

Stampin' Up! Sale-A-Bration 2021

Archives

Categories

Disclaimer

This is my personal blog and I am responsible for its content. Stampin' Up! does not endorse the use of or contents of the classes, services, or products offered here. All of my own ideas & creations are © Tina Zinck. Should any item be "cased" then proper credit will be given to the creator of that item.

Content © Tina Zinck, all rights reserved. Wordpress Genesis Framework customized by WebsByAmy, LLC